Thursday, September 2, 2010

The four new ribs are taken off of the canoe to finish setting while I remove the smashed ribs that they will be replacing.

There is a lot of wood to remove! Not much left, is there?

And here they are installed. Now I am ready to replace the planking that has been removed.

A long shot of the canoe all closed back up, sanded, and ready for varnishing of the interior. The interior requires a minimum of four coats of varnish, each coat sanded and cleaned of all dust before the next coat is applied. After the varnish is complete the canoe exterior can be prepared for canvassing.

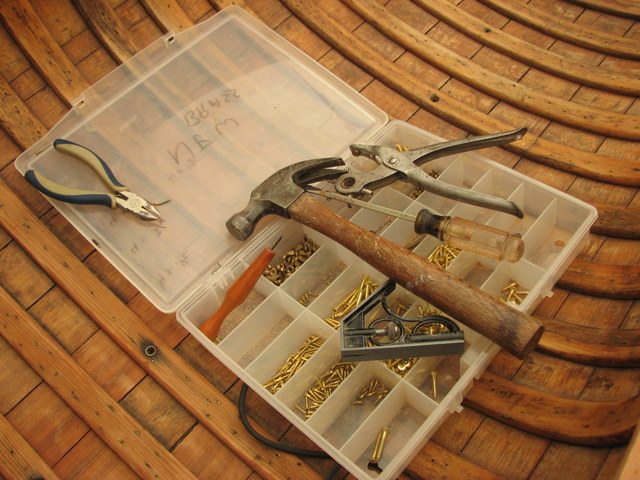
These plastic boxes are great for holding all of the necessary fasteners that could be needed. It never fails that what you think that you will need does not include what you really need.

In order to get the correct angle at the end of the gunnels you have to let the cross, then set a line down the center. Then fiddle around getting it just right.

Next step is to make some new decks. Here is a view of them from the bottom showing the arc at the interior edge.

The decks installed and the last of the ribs being fitted. These can only be fastened after the inside edge is shaped to allow for a taper which brings the outside of the rib closer to the gunnel in order for the outside gunnel to sit flush at the stem end. Sounds more complicated than it actually is.

A view of the canoe with the new gunnels.

Once the gunnels are finished being installed and the last ribs are secure, it is time to prepare and bend the replacement ribs.

These are the old gunnels out. Good thing, they were really bad.

Canoe with the gunnels gone.


And new gunnels getting installed. Carefully.

And fitted for the stem ends.

Time to make some new rib stock for the repairs of the ends of the ribs.

Then they are cut to approximate size and one end is cut to a taper using a jig sled for the bandsaw. This ensures that every taper is the same.

Next, the rotten rib ends are cut off. This canoe has about 25 that needed attention.

Then the ribs are marked and the same taper is applied to the cut end.

Epoxy is used to glue on the new rib ends. And clamps, lots and lots of clamps.

I take in the "basket case" MPC wood canoes, the ones that no one else dares work on, fix them up good, and get the canoes back to camp.

This time I am working on a Peterborough low end Champlain. This is the only one that MPC has and it is a favourite of many paddlers. A few years ago it had the misfortune of being blown off of the canoe rack and was impaled upon the next rack. The gunnels were smashed, as well as four ribs, a bunch of planking, and, obviously, the canvas.

That cap at the center thwart hides a broken gunnel.

This deck will need replacing. While the work is competent it is entirely not in keeping with Peterborough methods.

Many of the rib ends are rotting and will have to be replaced. Also, you can see the rot that has set into the inner gunnels.

All those breaks and the rot mean only one thing: they have to be replaced. Here is a new pair of Fir inner gunnels with the sheer near the stem end being steam bent.

During my visit to camp in July I was there to do some canoe work. Part of the task was to examine what tooling resources are in the NEW SHOP!

Not much.

So I put together a list...a rather long list.

Then I got to work on a canoe. One of the Wabasca canoes, the ones that every one refers to as the "Jamie Thompsons" was canvassed, filled, and painted last year. That meant that it was ready for gunnels. Except that one of the pair was broken during the work session last year.

What to do, what to do.?

While checking out the canoe parts stuffed up into the rafters I found some gunnels, including a pair of nice spruce gunnels stock which I decided to take back to the shop for the Peterborough project, and pair of new Oak gunnels. The Oak gunnels were way over size so I cut them down, and I rounded over the corners.

Here is the canoe getting the gunnels installed. I left the canoe with the gunnels sanded and ready for varnish.


I had a helper for a few hours. Thanks David!


I have a few more shots of the wood canoes at MPC from my summer's visit.

Canoes in the dining hall.

Canoe lessons on the front bay.

The wood canoes on the canoe rack. The waterfront rack is all metal now, so its really rough on the wood canoe gunnels, also there is no room left for them.

Jeremiah's canoe is all done and I had a chance to take a few photos of it on the water during Girl's Camp last July.


Thursday, June 10, 2010

Hey everybody! The new camp season is upon us, so its time that new wood canoe stories will be happening and, hopefully, added to this blog.

As for me, I'll be returning to work on MPC's Peterborough soon enough. I have been busy with canoe building and repair steadily since the last entry here.

You can read about the year's work here: http://woodbecreative.blogspot.com/

Part of my recent work is the building of a 13' solo canoe for Jeremiah Heinrichs. I'm sure that may of you will be seeing it around at camp, so while technically speaking it isn't an MPC canoe, it sort will be by association. You can read about the full build on my blog.

Here is Jeremiah burning the nap off of the canvas. He came over to the shop to participate getting the canvas on.

-Doug Ingram

Here is what it looks like now as the trim is being varnished.